How to Make: Tanning Fish Hide
 I recently went shopping for a new pair of cowboy boots. There were endless choices: lizard skin, snake skin, elephant skin, buffalo skin and the standard cowhide version. “Why not fish skin,” I inquired?
The clerk laughed. “We don’t get many requests for those.”
The idea of fish leather came to me after dulling my filet knife on a large Chinook salmon. Its skin was sufficiently thick that tanning its hide was not a stretch of the imagination. However, I soon found out that my idea was not original.
A brief search of the internet identified several companies that tan fish leather. Products were available in both glazed and suede leather, as well as being dyed in a range of colors. The range of products that can be made from fish leather is astounding. Standard items offered by leather companies include belts, wallets, watch bands, and shoes. The most innovative ones include a hip flask, a hurling ball, golf gloves, and even a bikini! Items made from fish skin were not cheap. Wallets ranged from $50 to $70, belts from $35 to $85, and shoes $300 and up. My favorite, a golf glove with fish leather inserts, was a bargain at $17.75.
While specifics from fish leather companies are considered trade secrets, general tanning methods are similar to those used for animals. I found that many companies first treated skins with water-resistant fats and oils. This step helps keep the product supple. Sea Leather Wear (www.sealeatherwear.com) reported using a 30-day chemical and mechanical process that included churning, soaking and vacuum drying. A final step in commercial processing includes cleaning with water and dirt-repellent chemicals. Skins used for shoes are processed with a layer of polyurethane or “glaze” to protect against scratches and stains. Each product is unique and is purported to have no fishy odor.
Historical Use of Fish Skin
The use of fish skin for clothing has been around for a long time. In fact, fish “leather” is reported to be the second strongest leather known to man. I found one article describing how women from the Amur River in Siberia left salmon skins to dry in the shade before beating them out flat with a mallet. They next rolled the skin around a wormwood stick (this shrub contains the licorice-flavored liqueur absinthe) and soaked it in water. After the skin dried for several hours, it was unrolled and stretched. The final step was to hang the skin above a hearth and smoke it for up to two weeks.
In Siberia, fish skins continue to be used for many purposes. One tribe wears vests and shirts made of fish skin lined with cotton. In the winter, traditional headgear might include ear muffs made of fish skin. Fish skins are also used for making sails and window drapes. Boots made of fish skin are reportedly light and waterproof. Natives line them with grass to keep the feet warm.
Shoes and clothing of North American tribes were mainly constructed from animal or bird skin. However, fish skins were used as a kind of “saran wrap” for preserving dried salmon. The Yakama Tribe of Washington State lined hemp baskets containing pulverized salmon meat with dried fish skin to keep them air-tight. Other Columbia River tribes had a similar practice that involved bags of cattail leaves lined with salmon skin.
How to Prepare and Tan Fish Hides
Interested in hanging a fish skin on the wall? How about making a wallet or a fancy belt? Let’s first briefly review how animal skins are tanned before proceeding to fish. In the Middle Ages, old urine was used to process animal skin. We now have more refined approaches such as brine curing.
The first step involves soaking skins in a salt solution containing disinfectant for several hours. Following curing, skins are soaked in water to eliminate salt, blood and dirt. The skin is then scraped to remove excess flesh before being immersed for several days in a dilute solution of lime and sodium sulfide to remove hair. The flexible end product is tanned with either vegetable or mineral (usually chromium) agents. Depending on final use, skins may be lubricated with oils and emulsions (i.e., soap, grease, wax). After dyeing, animal skins are stretched, dried and finished for use.
Dried skins can be hung from a wooden frame and soaked in a tanning solution made from the bark of oak, chestnut or hemlock for up to several weeks. To make the tannin brew, place strips of bark in container full of water and agitate until the solution turns dark like gas-station coffee. The skins should be checked periodically until they are fully penetrated by the solution. Boiling bark and water until it turns the color of indigo can accelerate the tanning process. Other methods include rubbing the “hide” with dried alum and soaking the hide in a solution of alum and salt for three or four days.
Fish Leather
Variations on the above methods can be used to make fish leather. After filleting, a critical first step is skinning the fish. Place the fish skin side down on a cutting board. Starting at the tail, insert the blade of a sharp flexible knife between the meat and skin and carefully cut away from yourself. Hold on to the tail section with a pair of pliers while slowly sawing back-and-forth at a 45-degree angle. Be careful not to puncture the skin. Removing scales is easiest before the filleting process.
The average angler may do well by practicing on common freshwater fishes. As mentioned, pre-spawning salmon and steelhead are an excellent choice because they resorb their scales and develop thick skin as a defense mechanism while protecting spawning territory. Other possibilities include carps, catfishes and suckers. I found the skin of rainbow trout too thin to work with.
Old timers used wood ash, builders lime, and brains to remove hair from animal skins. It has been said that all animals have just enough brains to tan their own hide. Since fish don’t have hair, you don’t need to crack their skull to cure the skin. You start by brining skins to toughen them up.
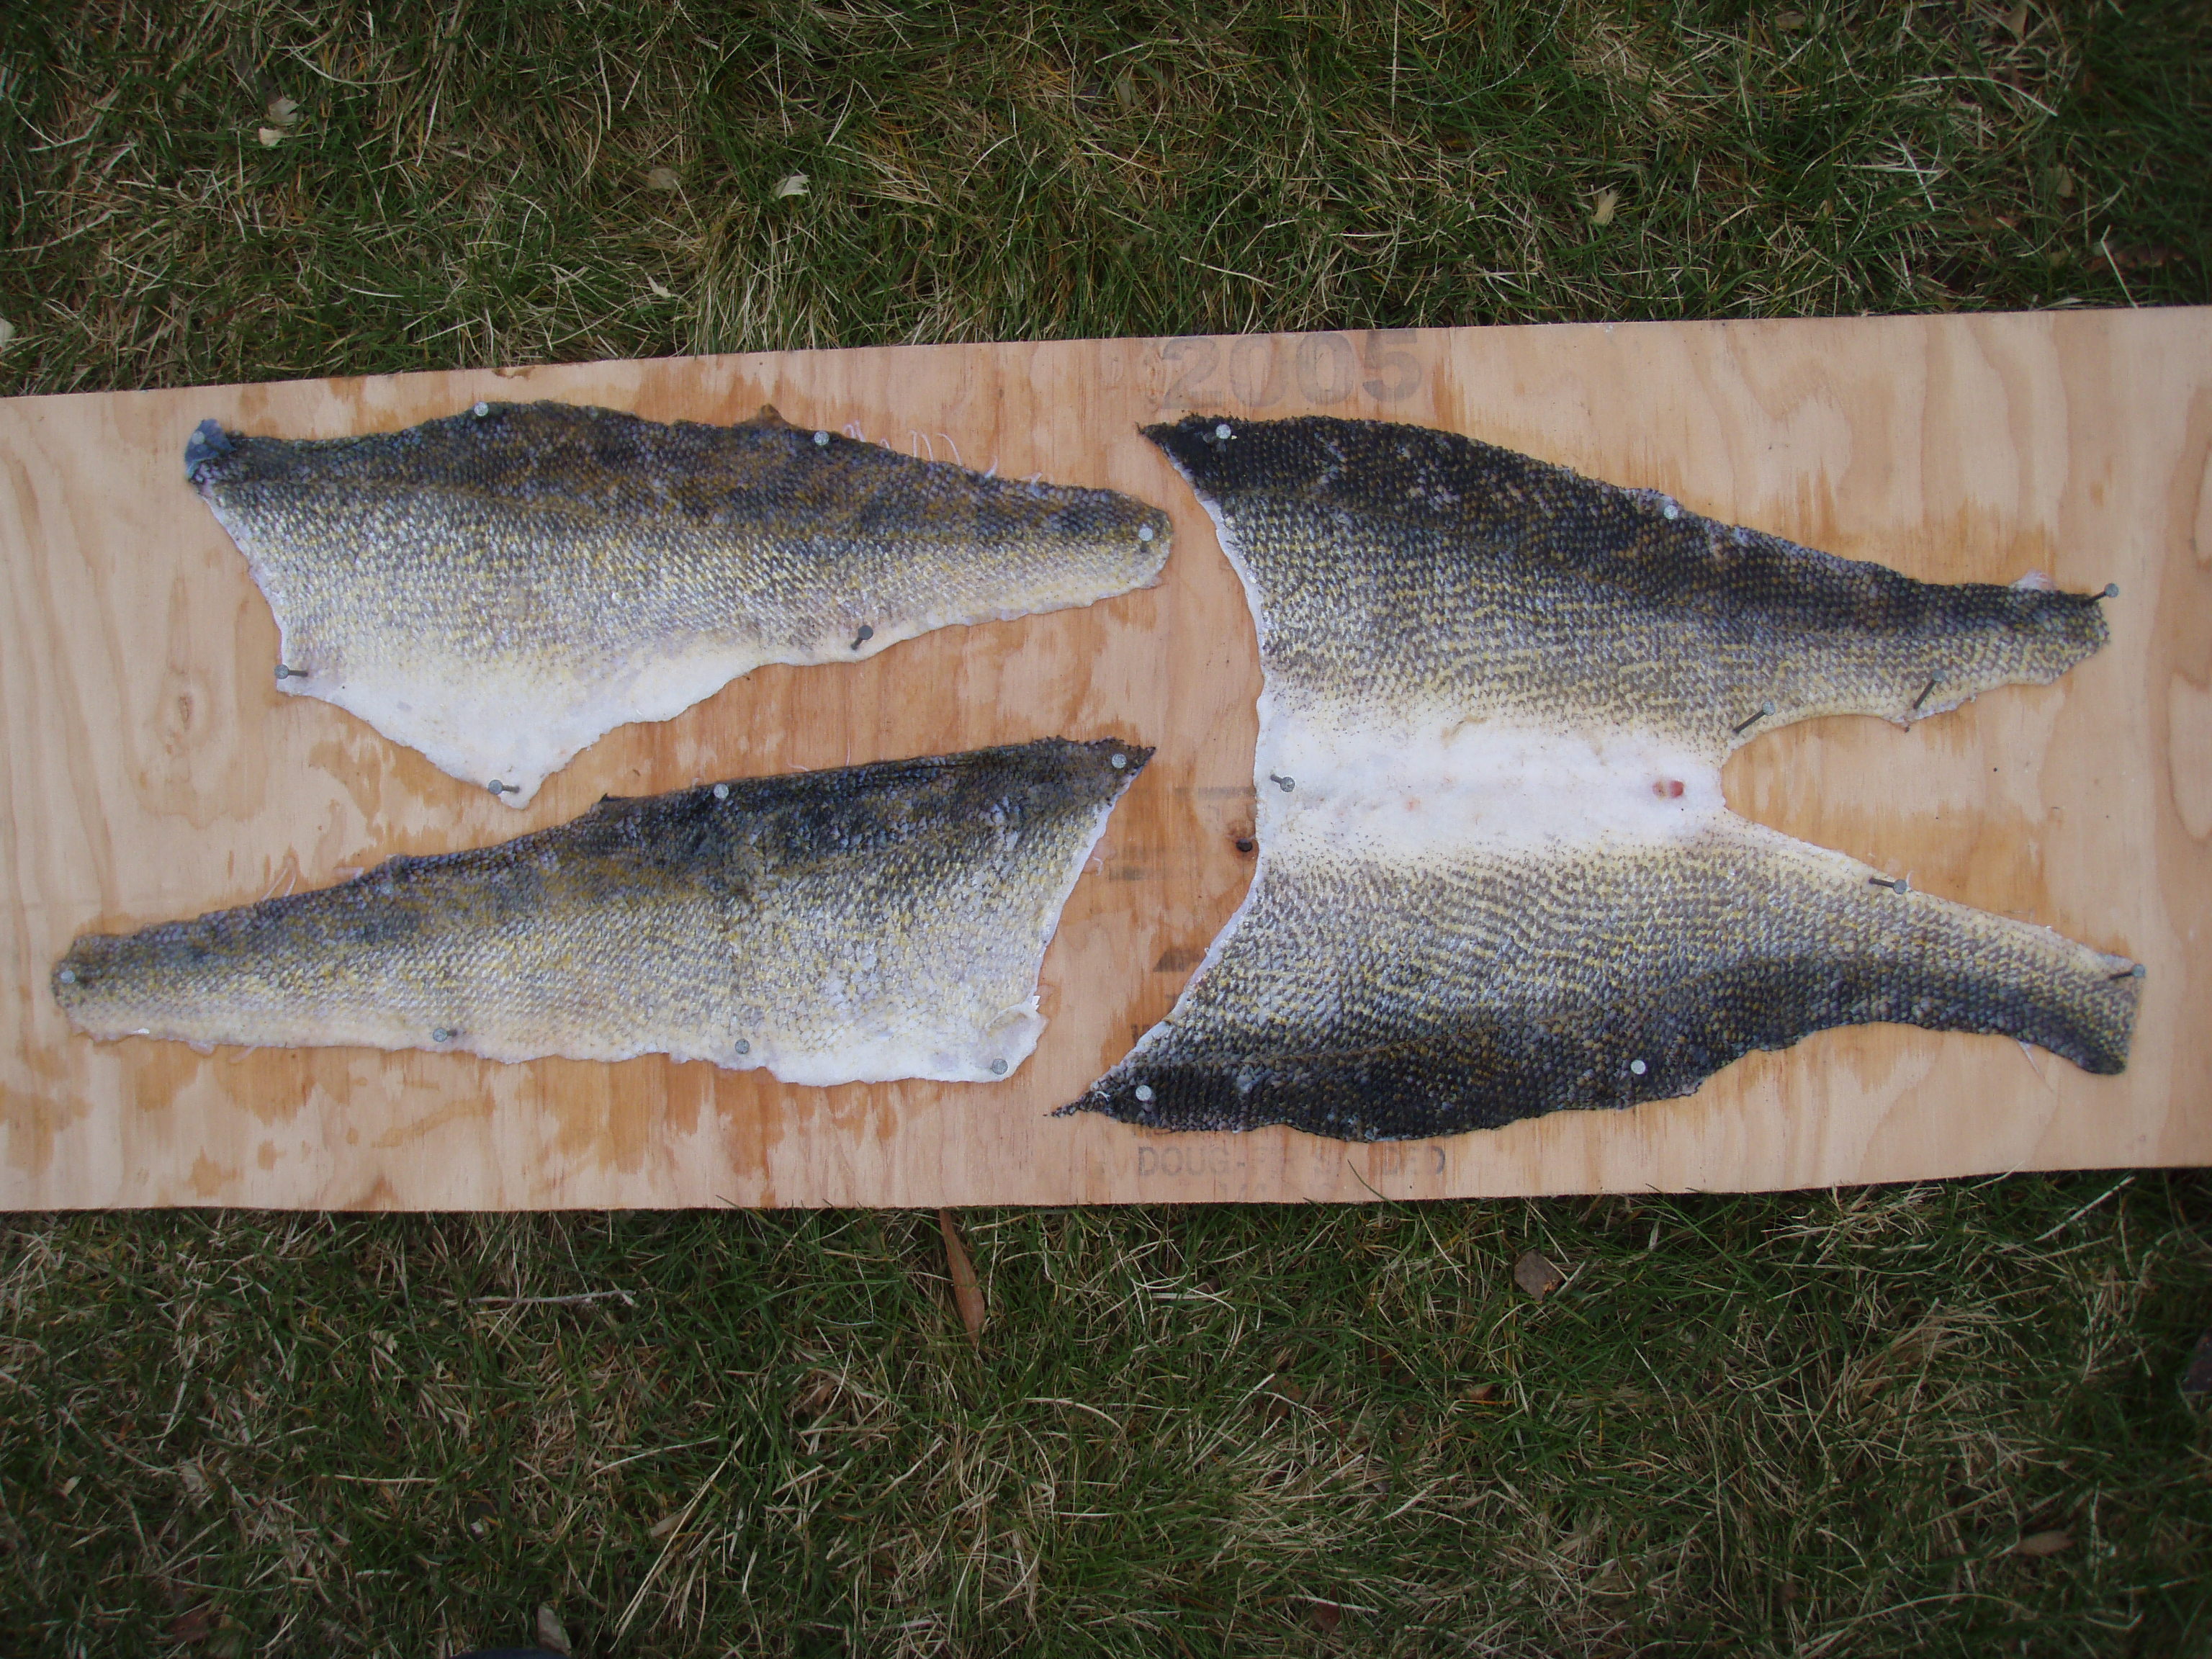
I tested my tanning ability with two 4-pound walleyes. My effort yielded two filet-sized skins from one fish and a “butterfly” piece from the other. Removing the scales reminded me of the need for safety glasses. I covered the skins in a solution of two cups plain salt in eight cups of water and refrigerated for 48 hours. After brining, I rinsed them in clean water and scraped loose scales and remaining flesh using a heavy carbon steel Chef’s knife. Alternatively, skins could be washed in soap and water, rinsed clean and tacked to a board to stretch and dry. They need to be worked occasionally to keep them pliable.
You may wish to experiment with different finishes that include sandpapering, a coat of varnish or by applying boot grease. Beef tallow, lard, and beeswax can also be worked into hides to keep them pliable and soft. Most shoe repair shops have a wide variety of products for treating leather and providing flexibility. I confess to not trying the chewing method.
Thin-skinned fish can be applied as a “veneer” by gluing over other materials. You might “go with the grain” or contrast belly skin with that from the back to provide interesting patterns. Small skins are useful for decorative crafts while larger skins can be used for production projects. Hang the finished product on your cabin wall or stitch skins together to make a wallet, belt or a hatband. No matter what, it will be unique.
Despite having made many useful objects out of cowhide and deerskin, I found working with fish skin to be a challenge. It is difficult to sew and tends to dry up and stiffen, somewhat similar to the skin from reptiles and snakes. On the plus side, each type of fish leather has unique texture that relates to the fish’s color pattern and scale size. I plan to stay with it though until I parlay the skin of a spawned-out salmon or a big old sucker into an object worthy of entering in the craft section of the next county fair.